I made this bent shaft after a trip to the Boundary Waters. I saw loons up close for the first time on that trip and was really taken with their very graphic color pattern. A beautiful bird. Anyway, I wanted to make something to honor them, so I came up with this blade pattern. People seem really intrigued by how it was constructed, so I've posted some photos of the process on the sidebar to the right. (I tried to post them in this blog, but it didn't turn out very well.)
This is a much more complicated glue-up than a regular laminated paddle, so I wouldn't recommend it for your first paddle, but I think it would be easy enough once you have a couple under your belt.
This post isn't meant to offer instruction on gluing up blanks in general--I'll do one of those in a later post. This is just to show the steps for this paddle. That is I'm going to assume some prior knowledge, and leave out a lot of commentary on the basic steps.
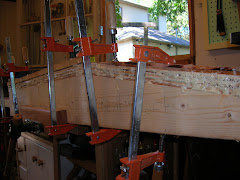
Probably the only part does need explanation is the photo titled "gluing the cookies," showing what I call "paddle cookies." (They remind me of those refrigerator cookies, with two layers of dough, rolled up and sliced, revealing swirl.) This is made with a thick strip of basswood, cut at an angle to form several "chunks," between which is glued a thin strip of walnut to form a multi-wood strip. This is then sliced lengthwise and laid open in "book matched" pieces of wood. The two pieces of book match are then glued to both sides of a blank as you would any other strip of laminate (shown in "gluing the blade").
Finally, I half-lapped a piece of cherry onto the tip to protect the basswood (not shown here). I also haven't bothered to show cutting the blade to shape, or carving it and the shaft with the spokeshave. That will be part of another post on paddlemaking basics. None of this shows up very well in the post, so I'll probably eventually create a webpage for better demonstrations. (Unless I can figure out how to format this blog a little better...)


No comments:
Post a Comment