Tuesday, January 29, 2008

Brazos, after glassing the front face


Here is a photo after glassing the front face. It didn't turn out too badly, though I can certainly improve on my technique in the future.

That cedar is awfully pretty, with some flame thrown in for magic.

I have a question for those of you who have glassed your paddles. Did you then coat the blade with varnish? It seems like the epoxy scratches fairly easily, and perhaps varnish would offer some protection? On the other, wouldn't the varnish just chip off the epoxy?

Sunday, January 27, 2008

De los Brazos de Dios


I've made an epoxy tip and am 'glassing the blade for a bent shaft paddle I made in the fall. I've been looking for a good paddle to use for our annual trip on the Brazos River, which is a slow-moving, shallow and sometimes rocky stream. Because it is shallow and slow, I've gone with a shorter, wider blade. I've made it out of cherry, walnut, maple, basswood, and western red cedar, hoping the combination will give me both strength and lightness. I'm glassing the blade and giving it an epoxy tip in hopes that it will give it some durability in the rocky parts of the stream.

I carved the paddle at the annual Conference for the Advancement of Science Teaching last November. I always take along a paddle blank and shave horse, and sit and carve a complete paddle over the two and a half days I'm there. It draws in people who would otherwise pass by the display touting our degree program.

The river's full name is "El Rio de los Brazos de Dios"--the river of the welcoming arms of God. I've always loved that name, and so have decided that this paddle will be called "de los Brazos."

Here are some photos of the epoxy tip and glassing process.

Thursday, January 24, 2008

Making a blank for the "Loon."


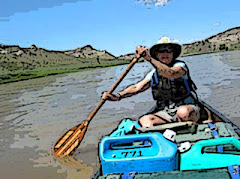
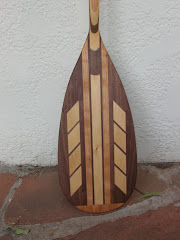
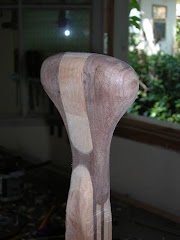
I made this bent shaft after a trip to the Boundary Waters. I saw loons up close for the first time on that trip and was really taken with their very graphic color pattern. A beautiful bird. Anyway, I wanted to make something to honor them, so I came up with this blade pattern. People seem really intrigued by how it was constructed, so I've posted some photos of the process on the sidebar to the right. (I tried to post them in this blog, but it didn't turn out very well.)

This is a much more complicated glue-up than a regular laminated paddle, so I wouldn't recommend it for your first paddle, but I think it would be easy enough once you have a couple under your belt.

This post isn't meant to offer instruction on gluing up blanks in general--I'll do one of those in a later post. This is just to show the steps for this paddle. That is I'm going to assume some prior knowledge, and leave out a lot of commentary on the basic steps.

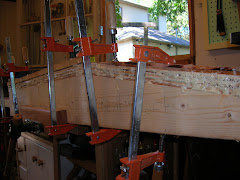
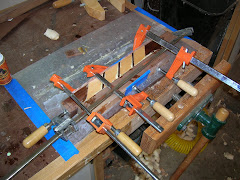
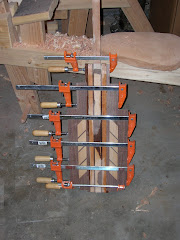
Probably the only part does need explanation is the photo titled "gluing the cookies," showing what I call "paddle cookies." (They remind me of those refrigerator cookies, with two layers of dough, rolled up and sliced, revealing swirl.) This is made with a thick strip of basswood, cut at an angle to form several "chunks," between which is glued a thin strip of walnut to form a multi-wood strip. This is then sliced lengthwise and laid open in "book matched" pieces of wood. The two pieces of book match are then glued to both sides of a blank as you would any other strip of laminate (shown in "gluing the blade").

Finally, I half-lapped a piece of cherry onto the tip to protect the basswood (not shown here). I also haven't bothered to show cutting the blade to shape, or carving it and the shaft with the spokeshave. That will be part of another post on paddlemaking basics. None of this shows up very well in the post, so I'll probably eventually create a webpage for better demonstrations. (Unless I can figure out how to format this blog a little better...)

Tuesday, January 22, 2008

Tapering the blade


There were a couple of things about carving the blade that I forgot to mention on Sunday. First, you need to taper the blade at the shoulder. See the picture at the left. Second, make the tip of the blade a little thicker than the rest to add durability. It doesn't need to be a lot thicker--just a smidgen. I tried to take a photo of this, but couldn't get it to come out right. Suffice it to say that it can run as much as 1/8" thicker than the rest of the blade edge. The blade shape will have a slight camber in cross section, as we talked about, and you should also be able to see this on the blade tip.

I'll try to get some better photos up this weekend...